|
First I had to decide what I wanted in a kegging system:
- flexibility
- expandability
- simple to assemble/maintain
- not overly expensive
One choice you will have to make is whether to use a refrigerator or convert a freezer. There are many arguments for using a refrigerator but the bottom line is you can only get 3, maybe 4 kegs in a refrigerator. I wanted to be able to offer 4 beers on tap and use my system to store/age beer before serving. This was the main reason I choose to convert a freezer.
When I started looking at freezers there were a variety of sizes and features. In my case I choose a freezer which was large enough to hold 6 kegs. Remember, the cost for getting a little bigger freezer is not that much. If future expandability is something you desire, you are better off getting the bigger size up front. As for other features there is only one thing I can really recommend. Don't pay extra for a frost free freezer, you won't be running it that cold.
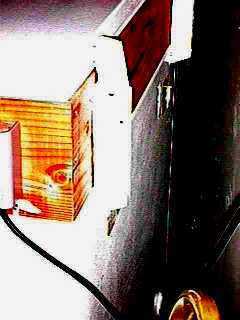
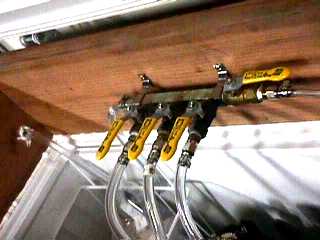
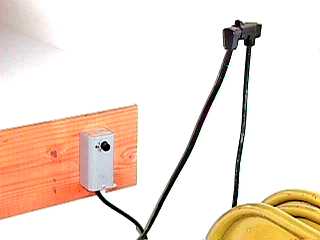
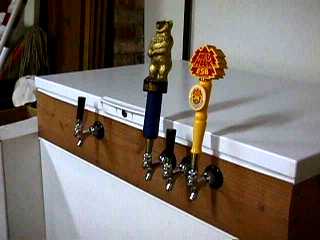
Once you have the freezer you'll have to figure out how you're going to penetrate it for the gas line, temperature probe and tap handles. You have to be careful with a freezer because the chilling coils are located in the walls of the unit. If you drill a hole and hit a coil the freezer is useless. There are 2 possible solutions, penetrate the lid or put a wood collar between the box and lid. I choose the second technique as I describe below. One major reason for doing this was the cost of a vertical tap head with handles can be very costly. The horizontal mounted handles can be purchased at a very reasonable price. It also let me add handles at my leisure rather than buying something larger than I need up front.
Building the collar is very simple. The only tools you'll need are a table saw and a drill. If you don't have a table saw you can use a hand circular saw. You'll need to take a couple measurements off your freezer and then basically build yourself a wood box. First you'll need to measure the outer dimensions of the freezer box. This gives you the outside dimensions of the box you are going to build. The next thing you'll need to decide is how high you want the box to be. One thing I noticed when building my collar was the distance between the screws which hold the lid onto the box. There are 4 screws in each hinge, 2 high and 2 low. The distance between these screws was around 7 1/2 inches. This is almost the exact dimension of a smooth finish 2" by 8" redwood deck board. I ended up buying a 16' board, cutting it into 4 pieces the dimensions of the box, mitering the corners to 45 degrees, ripping each piece down to 7 1/2 inches and connecting them with 3" countersunk wood screws.
Now its time to mount the collar and reattach the lid. I ran a bead of mildew resistant caulk around the top of the box, set the collar in place and set the lid on top. Attaching the lid is now very simple. |